Yeah, it’s been a while since I’ve posted any thing here at Stuff I Made This Year but it hasn’t been because I haven’t been making anything. In fact, I’ve been busier than ever! This Spring I put in new garden beds, made a homemade soil blocker as well as a bunch of planting flats, I refitted a bunch of beehives with top bar hybrid frames and have been making papercrete all Summer! Oh, did I mention that I also built a brand new website where I’m going to be describing all of these projects and more? Molly, my wife, and I are joining forces to create a bigger, better, cooler site devoted to all of our interests. It’s called Mike and Molly’s House and it’s just a quick hop, skip and a hyperlink away. I’m committed to posting regularly now and you can be sure Molly will make sure I do it. so come on over and check out all of our crazy hijinks at the M&M mini-farm…
Once upon a time there was a family that really wanted to build a greenhouse (pretty much just me). It was going to be about 15′ x 20′, made out of recycled windows and other scavenged building materials. I really wanted to have a place in the challenging New Mexico climate to nurture young plants and be able to expand the regular growing season. After debating the merits and disadvantages of various places in our yard we chose a site for the future greenhouse.
I spent a couple months of evenings and weekends flattening the site and digging a trench by hand. Next, I used a bunch of styrofoam forms (think giant legos) that Molly got from a concrete contractor to insulate and form the foundation walls that run from the footer to the top of the trench. We only got corner pieces (whadya expect? they were free) so I took the pile of corners, cut them up and fit them together to make the foundation walls. Molly helped me pour the foundation over the course of three weekends. We created a ridiculously over sized foundation for the requirements of such a light structure. The concrete cost about $600 which used up our entire building budget for the year. The only visible result of all this labor and money was a rectangular perimeter of concrete at ground level. That was Phase 1. Phase 1 was three years ago. As time passed other projects took precedent and the weeds took over their previous home again. In the winter we would dream about getting the greenhouse finished but there would be 3 feet of snow on the ground.
We had a milder winter this year and in January I decided that I was going to get my greenhouse. Instead of using the $600 foundation we had already, I decided I was going to make an entirely different structure in an entirely different place. As Molly watched and bit her tongue I started making plans to put an addition on the south end of our house that I could put up over the course of a couple weekends. My ideas was that it would be faster to build (so it would actually happen) and it could help heat the house plus one wall was already built. We even had a garden bed there already. I spent a day transplanting the chives and swiss chard that were hanging on and taking out a fence and gate that enclosed the garden. My day of prep taught me a valuable lesson. Even though that south facing garden got sun in the summer in the winter the angle of the sun was low enough that the trees blocked any direct light on my proposed greenhouse. So much for plan B. Back to Plan A! I pulled up the weeds and shoveled out the dirt that had accumulated on the foundation.
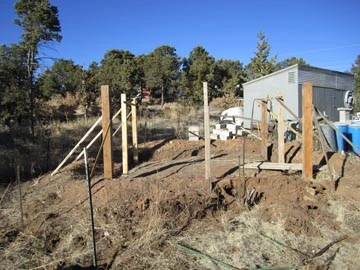
Starting to build
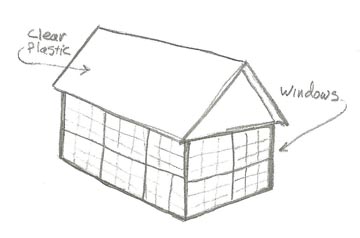
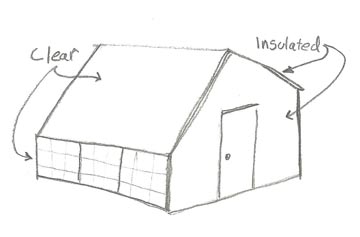
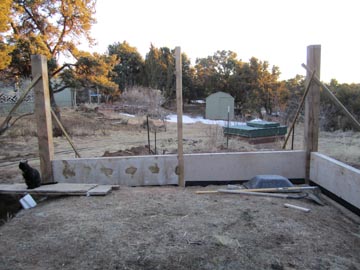
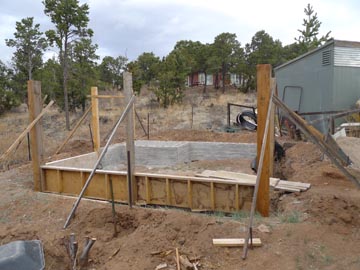
With only a vague idea of what the final shape of the building is going to be I put in posts at the corners and middles of each wall. I want a structure that is attractive to look at but also very energy efficient. Originally I was going to build a classic house made of windows but after reading a book on solar greenhouses from the library I decided that maximizing the solar gain by extending the south facing roof down lower than I had planned was the way to go.
I’m also insulating the north facing roof and all the walls except the southern one which will help significantly in retaining the heat gained during the day. I have 8′ poles sticking out of the ground right now but the south wall will end up to be about 3′ tall and the North wall 5′ or so.
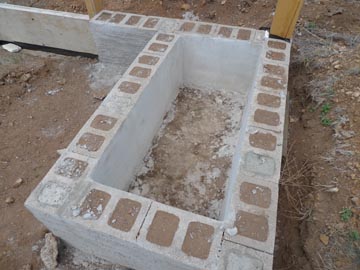 The lower part of the north wall is made out of concrete block and has an integrated pond. I back-filled the block with rammed earth to add mass to help store heat.
The bottoms of the rest of the walls are made with re-purposed plywood concrete forms I got from the Re-Store that were cut to fit and bolted to the columns to help stabilise them. They will get insulated with styrofoam insulation. The remainder of the north, east and west walls will be finshed with papercrete block. The south wall will be glazed with windows taken from an old fire lookout station.
I had my spurt of construction activity in January and then it snowed. By the time February arrived I needed to shift my focus to setting up an indoor seed starting station and getting planting beds built for the Spring. Once again the greenhouse sits… patiently waiting for Phase 3.
When I was young I used to love to get books from the library that were compilations of kid oriented projects. They were illustrated and had instructions on how to make everything from cardboard mustaches to rope making machines. I called them make-and-do books.
Instructables.com is a site where people post pictures and instructions on projects they have made. It’s a place where readers of make-and-do books gravitate. Instructables is to projects as that place in the Pacific ocean is to discarded plastic bottles. They bill themselves as the world’s biggest show and tell. The content is all user generated and in order to inspire people to post they run contests of all sorts. I have two recent entries. The first is a photo tour of my workspaces at our house. It’s entered in the Share your Space contest. The second is a reworking of the candied grapefruit post I did here for the candy making contest.
If you have any interest in making stuff you should try posting your projects at Instructables. I lurked there for 3 years before I finally posted and I’m glad I did it. It’s fun to get stuff you’ve made out into the world and in front of an appreciative audience. I keep a camera with me whenever I’m making stuff now to document it for this blog and Instructables.
There was a time when we threw out our trash like everyone else. That time ended this January after I saw an article about a lady in Mill Valley, CA who is trying to get to zero waste. Her emphasis is on not using disposable items in the first place. She brings pillowcases and mason jars to the store to put her bread and bulk items in. The idea being that if you don’t bring home stuff you are going to throw away in the first place then you have dealt with the problem at the front end. While her approach is admirable I’m not quite ready to take on all the forethought and behavior changes required for me to implement it. We were already recycling metal, plastic and glass as well as saving kitchen scraps for our chickens. A good start, but really, sorting recycling is still just pushing the problem out of your house and giving your leftover stuff to someone else to deal with. I think its more interesting to figure out what to do with all the stuff we bring home. Rather than looking at it as trash I’m seeing it as “free” raw materials. Looking at what we get rid off I found it could be easily sorted into the following classic categories: Food scraps, Compostable trash, Paper/Cardboard, Plastics, Glass and Metals.
Food Scraps & Compostables
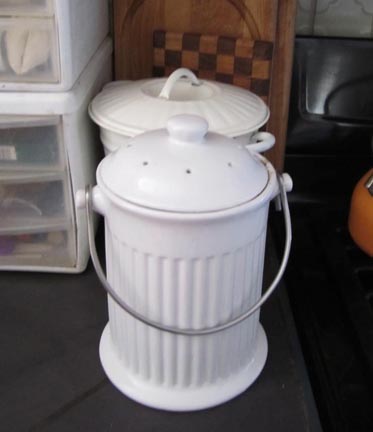
This one was easy. We have chickens and a couple of compost piles. We were already saving the food bits for the chickens. A fair proportion of our trash can contents was stuff that was compostable like paper towels or food containers. All that we needed was a second container on the counter to gather stuff in. The bin in the back is the “Chicken Bowl” and the one in front gets everything else.
Paper and Plastic
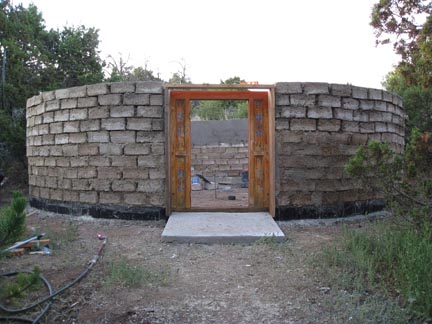
Two years ago I built a papercrete mixer which is essentially a giant blender that you tow behind a truck. It gets filled with scrap paper, cardboard, cement and water. Inside of the mixer is a lawnmower blade that spins as the mixer is towed. After driving slowly for a mile or so you end up with a bunch of pulped paper mixed with cement. You can then cast this goop into blocks or any other form you like. After the block has dried its light weight and very durable. The blocks can be stacked and used as walls in buildings. You can even use papercrete to mortar the blocks together and then plaster over them.
I have been using papercrete as a building material around our place with good results. All of our junk mail and other scrap paper has been going into papercrete blocks.
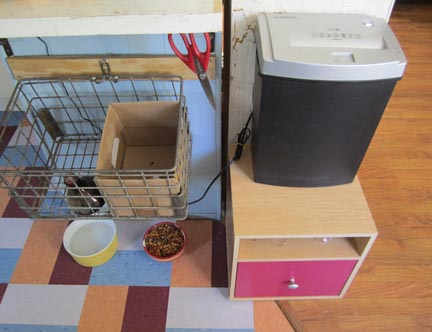
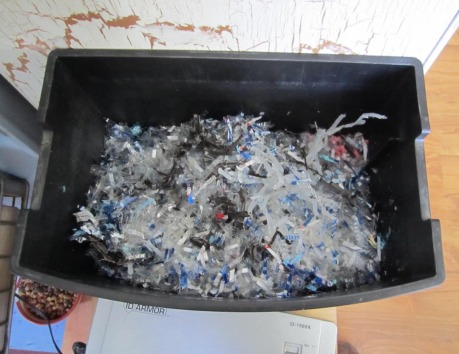
At the sorting station the paper gets put in the pink drawer under the shredder. It occurred to me that there is no reason we couldn’t shred all of the plastic we were recycling and stick it in the papercrete mixture as well. Now, every time we finish a gallon of milk it gets cut up with the red scissors and fed into the shredder. Any plastic bags or containers that aren’t getting re-used get shredded too.
Any other little bits that can’t be shredded like soda bottle caps are collected and put in with the papercrete materials.
Glass
The glass goes into the wire basket. My plan is to crush it and use it as aggregate in concrete for building projects. Crushing glass can be a bother so I’m going to try making an metal cage to fill with bottles and heat them over a fire. Once they are good and hot I’ll dump them in water which should do all the shattering work for me. Since I have several huge piles of branches from dead trees I will get to use some of them up as well in the bargain.
Metals
The metals go into the cardboard box inside of the wire basket. They are a pretty small part of our waste stream. Aluminum is easy since I already have a small metal casting furnace. It will get melted down and cast into something interesting. The steel consists of mostly food cans. Some of the cans will get re-purposed as containers. The rest I’m not sure yet. Luckily, there isn’t a whole lot of it so it won’t pile up too quickly.
Storage
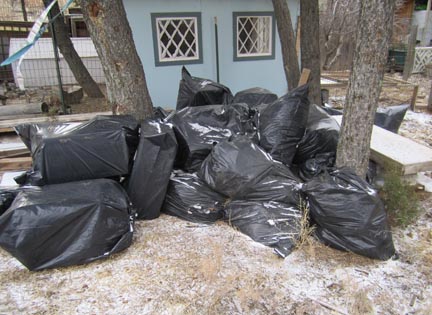
One of the issues with this plan is what to do with the stuff that’s being collected until it gets used. The main storage challenge is the paper and plastic. Papercrete making is a summer activity so the paper and shredded plastic gets bagged in contractor bags until I’m ready to use it. Someday I want to build a bin or small shed to store them in.
My pile of plastic bags by the chicken house isn’t the most aesthetic component of our landscaping but they get used quickly when I’m making blocks. In fact, I end up going to the recycling place and making withdrawals rather than deposits much to the amusement of the people who work there.
Obviously this approach to trash management isn’t going to work for everyone but that wasn’t the point. I’m just experimenting with using what I have in the most useful way I can come up with.
Like papercrete? Come on over to our new site Mike and Molly’s House where we’ve got a bunch more info on making and building with papercrete.
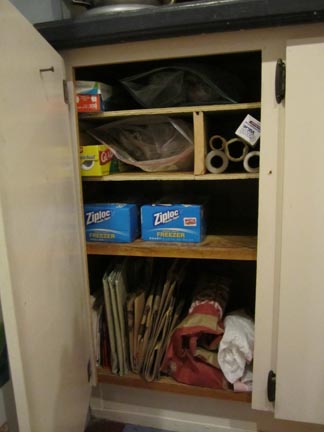
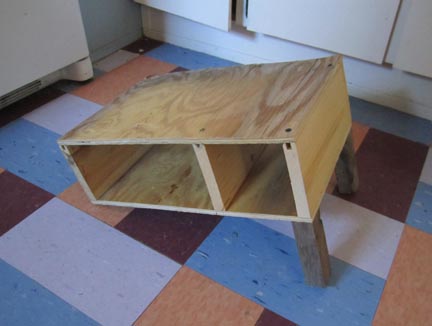
I took off two weeks from work over the holidays. As usual, I had all sorts of big plans about what I was going to do in all my free time. And, as usual, I accomplished about 30% of what I set out to do. I spent the first week writing instructables about building the cheese press and holiday baby hands. At the beginning of the second week Molly and I did a round of de-cluttering in the living room and the kitchen. While looking at ways to make the kitchen storage more efficient I came up with all sorts of ideas about building drawers in the lower cabinets and adding another layer on top of the uppers to contain the overflow of storage sitting up there. I didn’t get either of those projects done though. I did make a simple organizer for the cabinet that holds the plastic bags and rolls of stuff- parchment paper, tinfoil, plastic wrap, etc.
This area has been bugging me for the past 8 years. Everything has just been piled on top of each other and usually when you take something out a tsunami of boxes and bags follow.
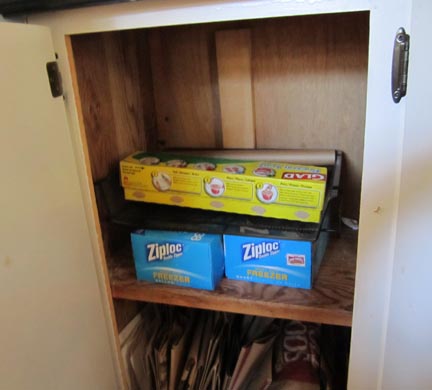
I got some scrap wood and drywall screws (my favorite medium to work in) and put together a shelf divider that works much better. Everything is contained and easily accessible.
Having already gotten a cheese cave together I felt a certain amount of pressure to build a cheese press so that I can get some product in the cave and ageing. I built the first version of the cheese press in early December. Check out the how-to on Instructables for construction and use details. The picture above is of the Cheese Press-o-lator Mark II. I gave the Mark I away (but not before I tried it out) to inspire me to continue working out the design more. I want to continue to refine this press design until I am satisfied and then sell them. New for the Mark II, I changed the gauge which is now a rod sticking out of the middle of the top. There are grooves inscribed on the rod that denote every ten pounds of pressure. It’s a much more elegant design than the cardboard strip I had before. I have to admit that I haven’t made time to make any more cheese that needs pressing. I will though, the cave was being used most recently to cure pepperoni. I did make a great fresh cheese that got given away to friends at Christmas.
Try it yourself:
Strain yogurt overnight in a cheesecloth (or any other cloth, t-shirts work well) until it has the consistency of spreadable cheese. I did it by tying the cloth around a wooden spoon and hanging it in a stock pot. You can also line a sieve with cloth and put it in a bowl. Mix in your favorite herbs. I used tarragon, thyme and cilantro. Garlic and rosemary wouldn’t be bad either.
Fast, Easy, Delicious!
Let me know how your cheese comes out…
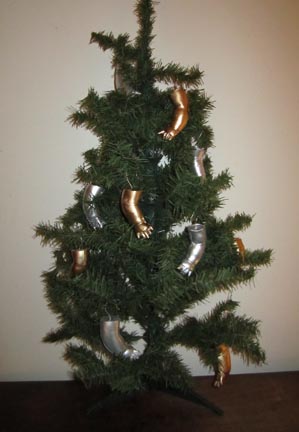
As I’m working through the backlog of projects that my Christmas vacation generated I’m trying to keep this blog as simple as possible so that I can catch up. I’m also posting more in depth how-tos to Instructables. This one was created specifically to try and win a holiday decoration contest on the Instructables site. Unfortunately I didn’t win but thanks to everyone who voted for me. I had already started the mold making process on the baby hands (as in I bought the plastic hands 6 months ago) because I want to re-create a project I did about 10 years ago of making stove burner knobs out of baby hands cast in aluminum. This one helped me move that project forwards a little bit and I got a new batch of holiday decorations!
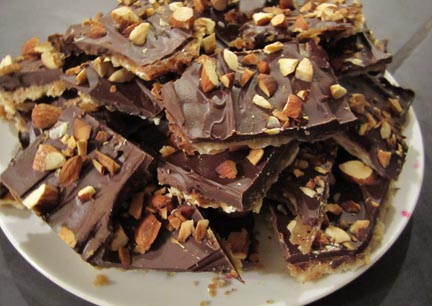
This Christmas we made goodie bags full of treats for everyone. In addition to the candied grapefruit peels we made cake balls, assorted chocolates and Matzoh Caramel Crunch. The Matzoh Caramel Crunch was so good it deserved its own post. Carefull though, if you decide to make it you may need to make a second batch to give away as the first one won’t make it through the day…
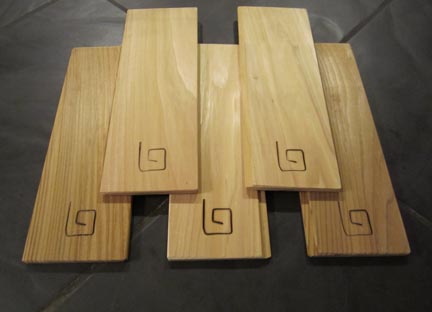
We had some leftover cedar tongue and groove board ends at work from a door building project. They looked suspiciously like the salmon grilling planks you can buy for your grill. I ran them through a thickness planer to smooth them and cut the groove side off on the table saw. The brand was made from a leftover piece of brass weatherstripping. I bent it into the spiral design and heated it over a small gas barbecue grill with pliers. I used a piece of scrap wood to press down on the brand once it was hot.
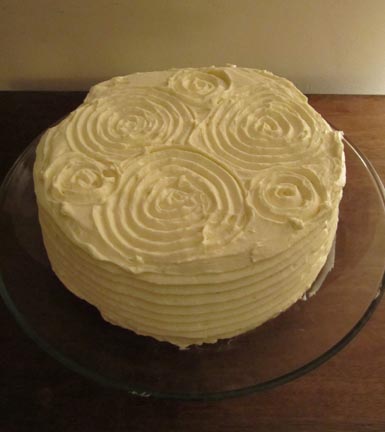
This year Sofia wanted an all white cake. We decided on the same white cake recipe from Shirley Corriher that created the epic fail cupcakes. I backed off the baking powder and it helped but it was still a fiasco. I over filled the pans and they started bubling up right away. I had to take the pans out and scoop out 30% of the batter from each one part way through baking. They also made big bubbles and sank in the middle when they cooled.
Not the best.
The filling was a creme filling for eclairs and the icing was whipped cream stabilized with cream cheese. I was able to hide the concave layers with a combination of over stuffing the middle with filling and plenty of icing. I used a comb that I cut out of cardboard to make the patterns.
In spite of the tribulations, the final result was delicious.
